|
So, when we bought the Gist Restoration and decided on having the paint removed from the glorious wood built ins around the house, there was one thing that we did not realize until after the paint was removed... 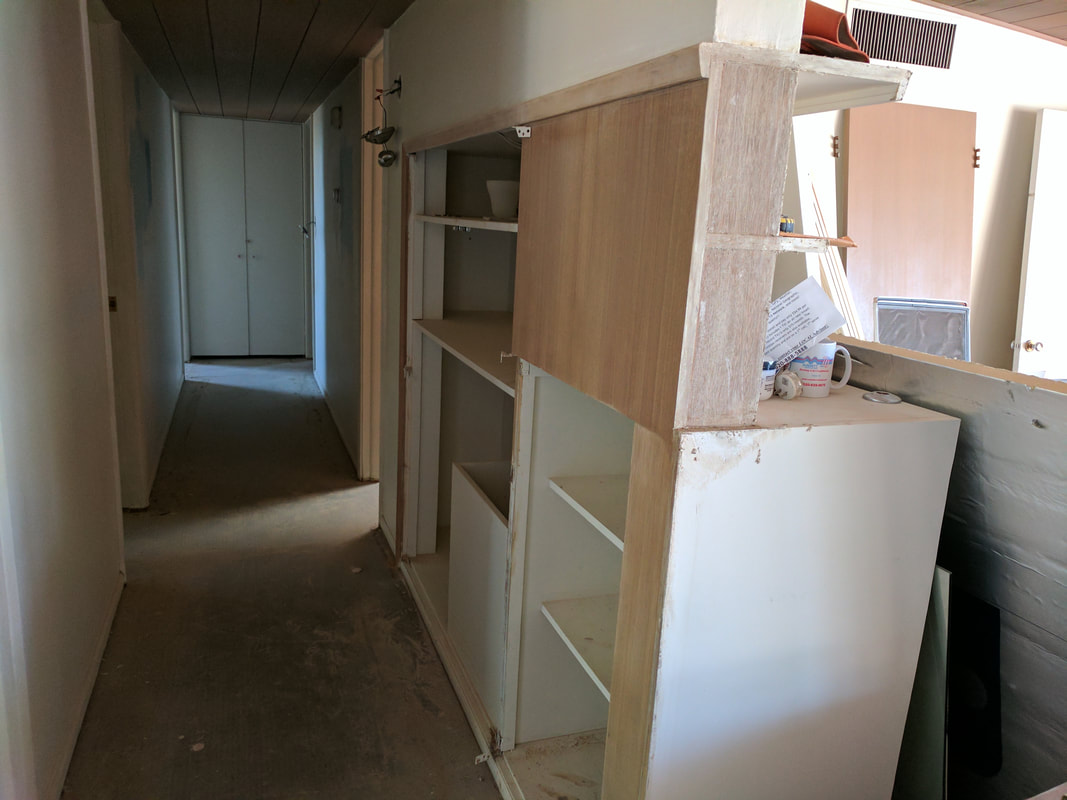 The built in right off the entry to the house (and at the start of the hall) was cut and partially removed. We get why the previous owners did this - it allows more light into the hall, but that was not what Gist originally had there. As you can see in the photo above, they cut the built-in, then slapped a piece of something on the end, painted everything white and called it a day.  The original built in, on the right of the above photo, was supposed to go to the edge of the brick entry. Now, in order to find a suitable replacement, rebuilding the original was likely not an option, as it would have been wildly expensive and hard to do, as one side is the original Philippine Mahogany and the other is another material. So, we talked to our contractor to come up with a suitable solution... 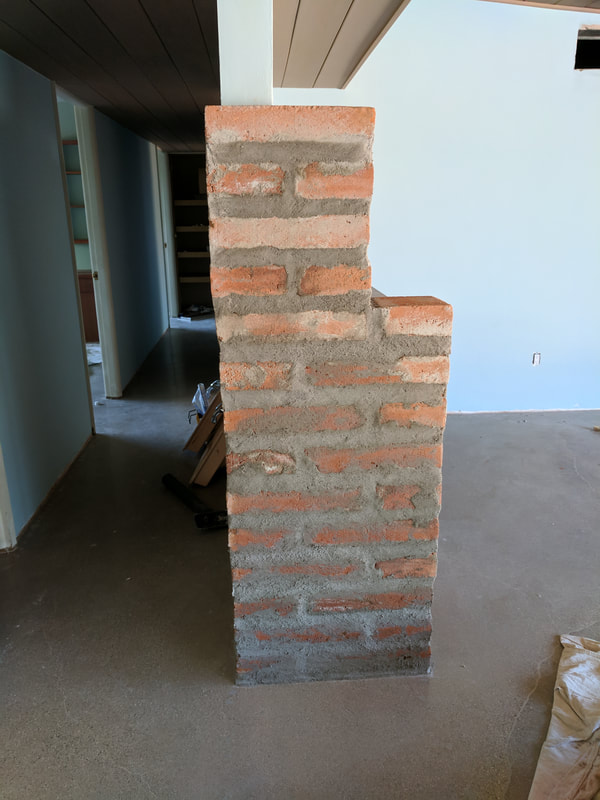 Although not the original type of adobe used on the house (this is Baboquivari adobe from Northern Mexico), it is a close enough match to the rest of the adobe that it makes sense to use here.  It's probably the best fix we could have asked for, considering. 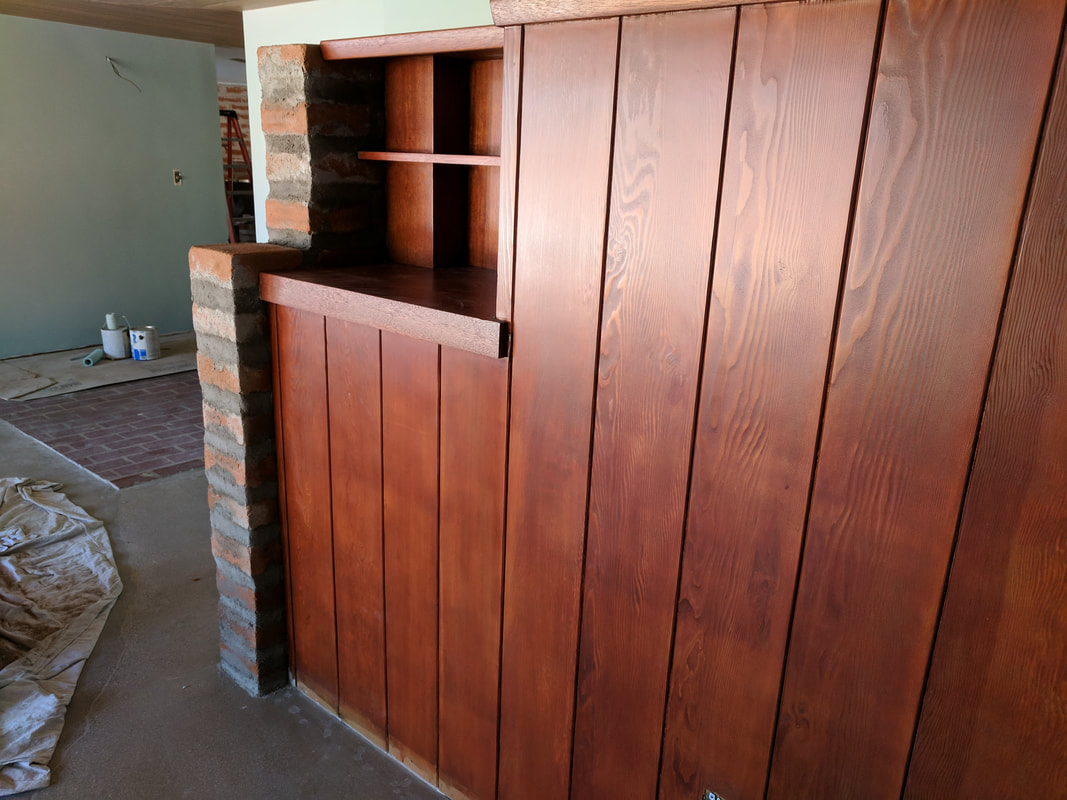
0 Comments
 Pool bath. 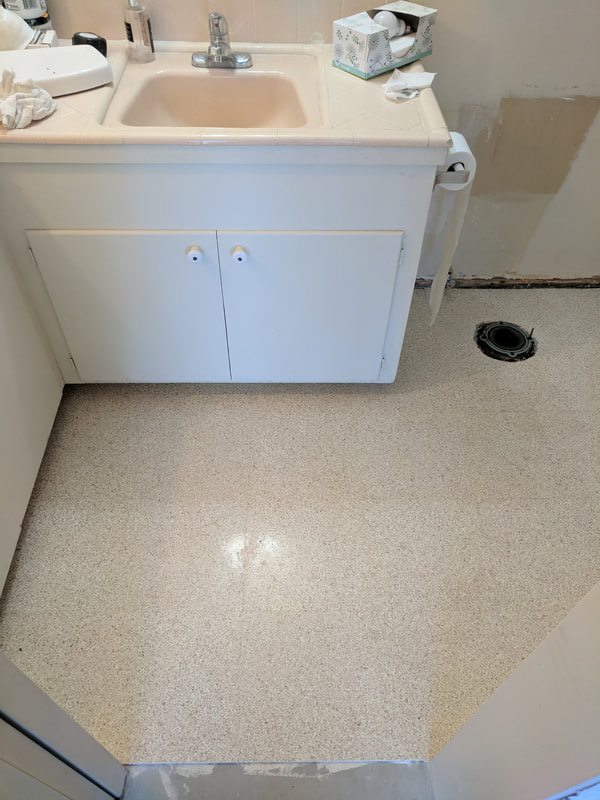 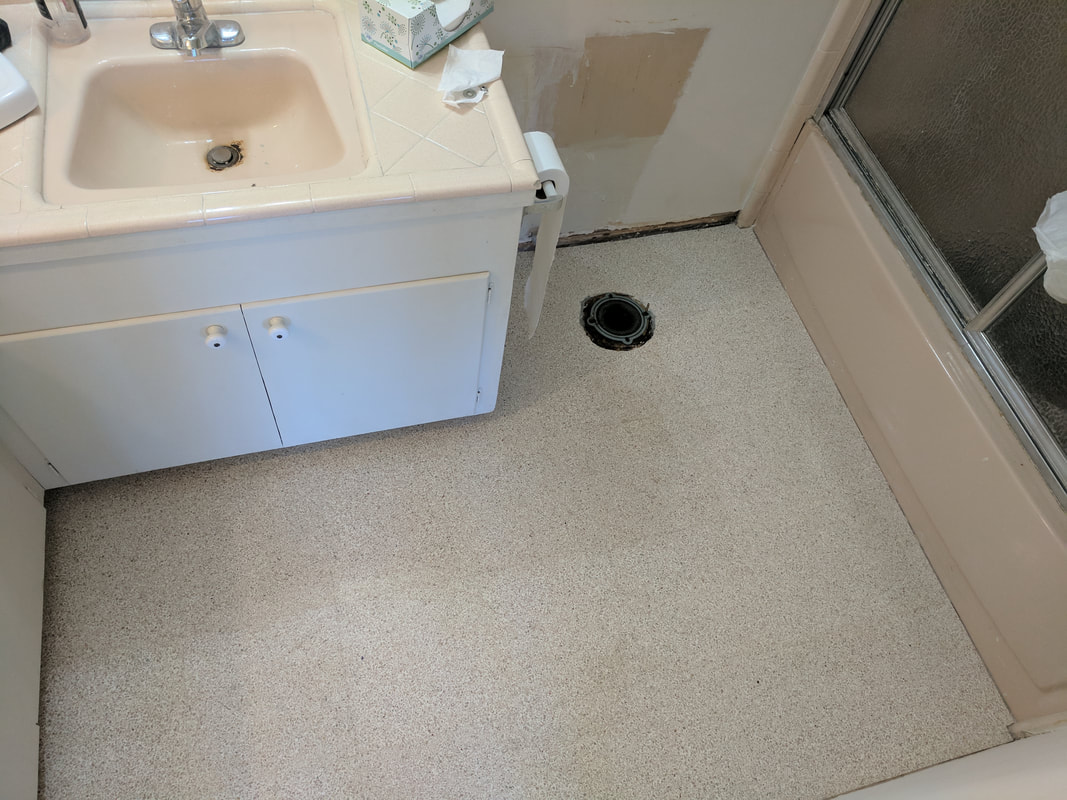 Guest suite bath. 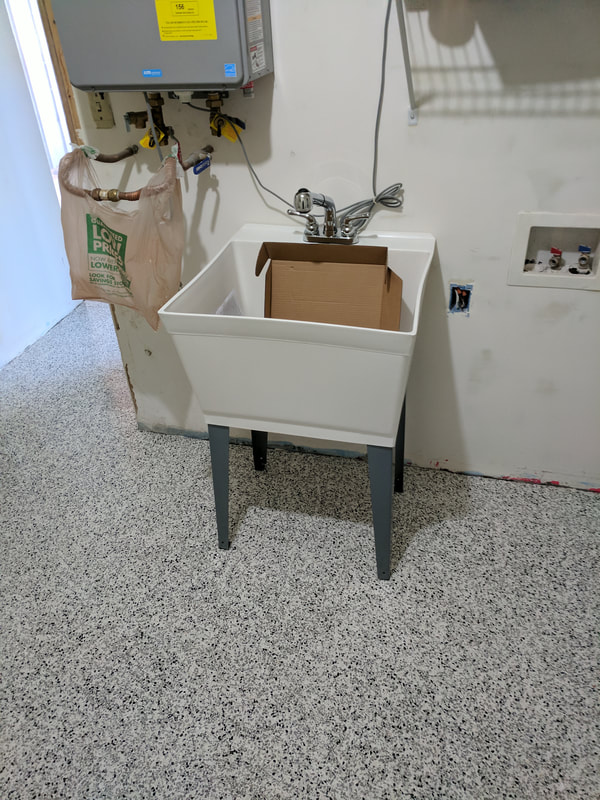 Laundry room with the tankless water heater and a temporary laundry sink.
We showed you how we installed the terrazzo tiles in the master and hall bath. Now, we will show you how the installation went in the pool bath, guest bath and the laundry room. 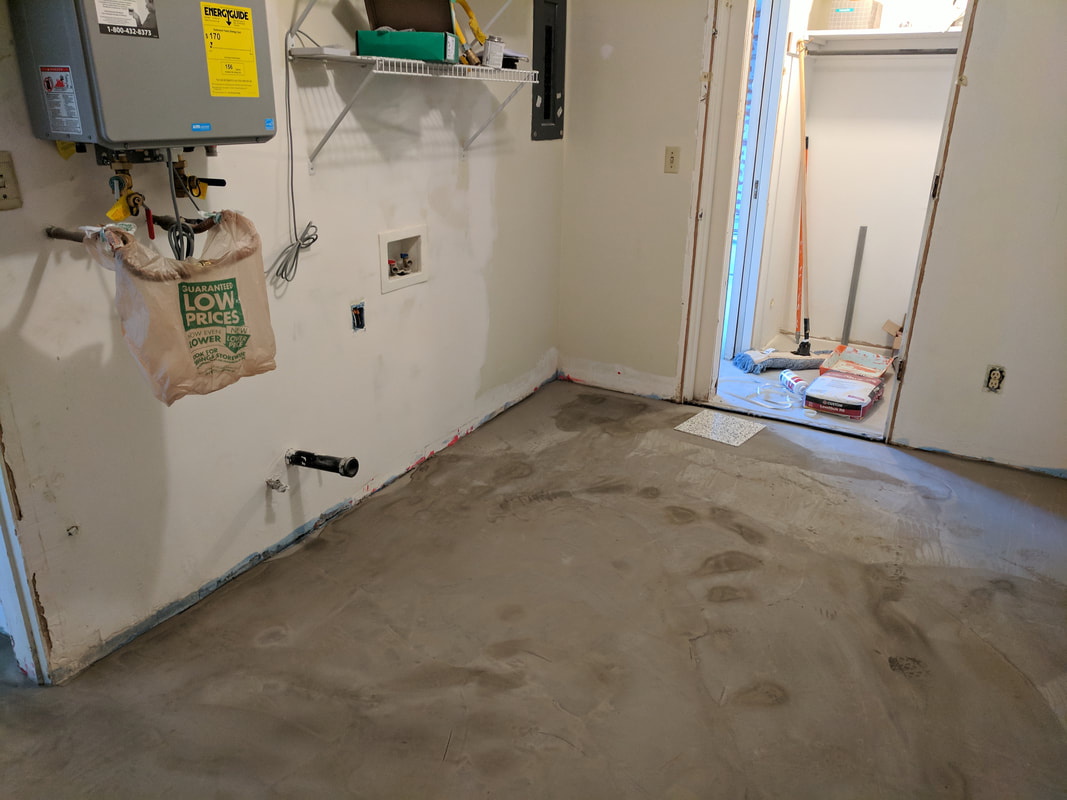 Here is what the Level Quick looks like before setting the tile. You can see the pops of red from the Red Guard in the center left of the photo.  Then, lay out tiles to find out how many you need, and to see where you need to grind down some of the Level Quick. 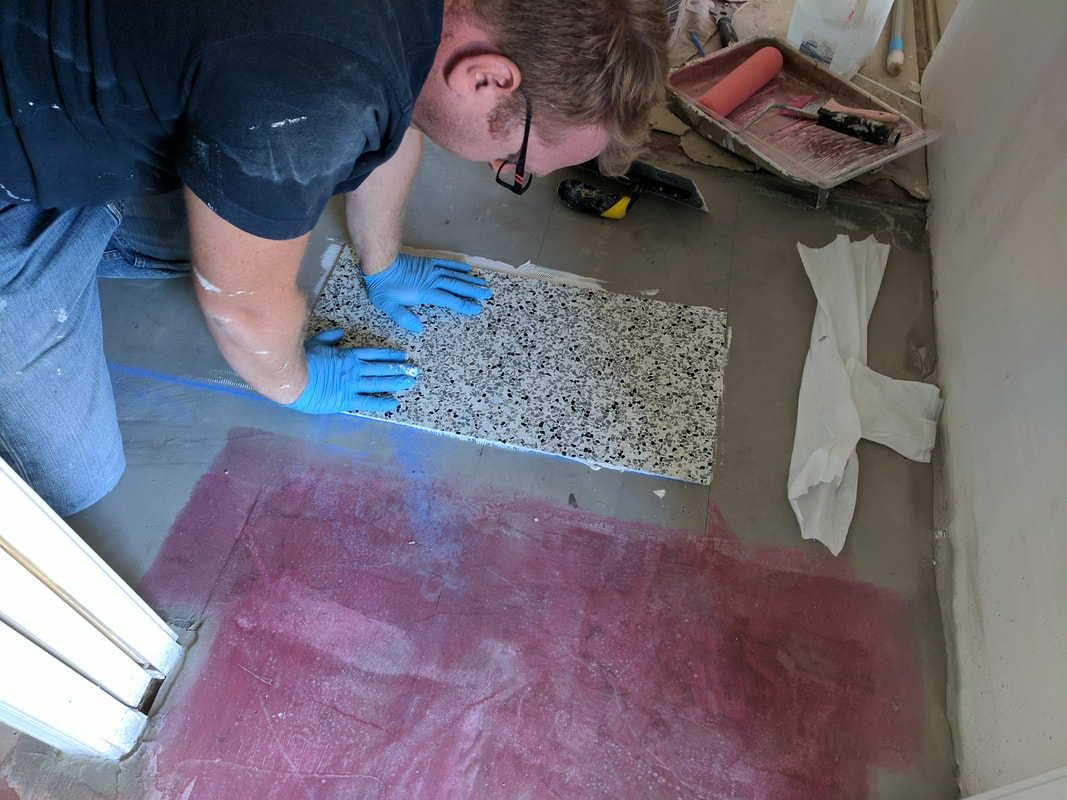 Lay lines if you need to, then put down adhesive, and start laying tile. 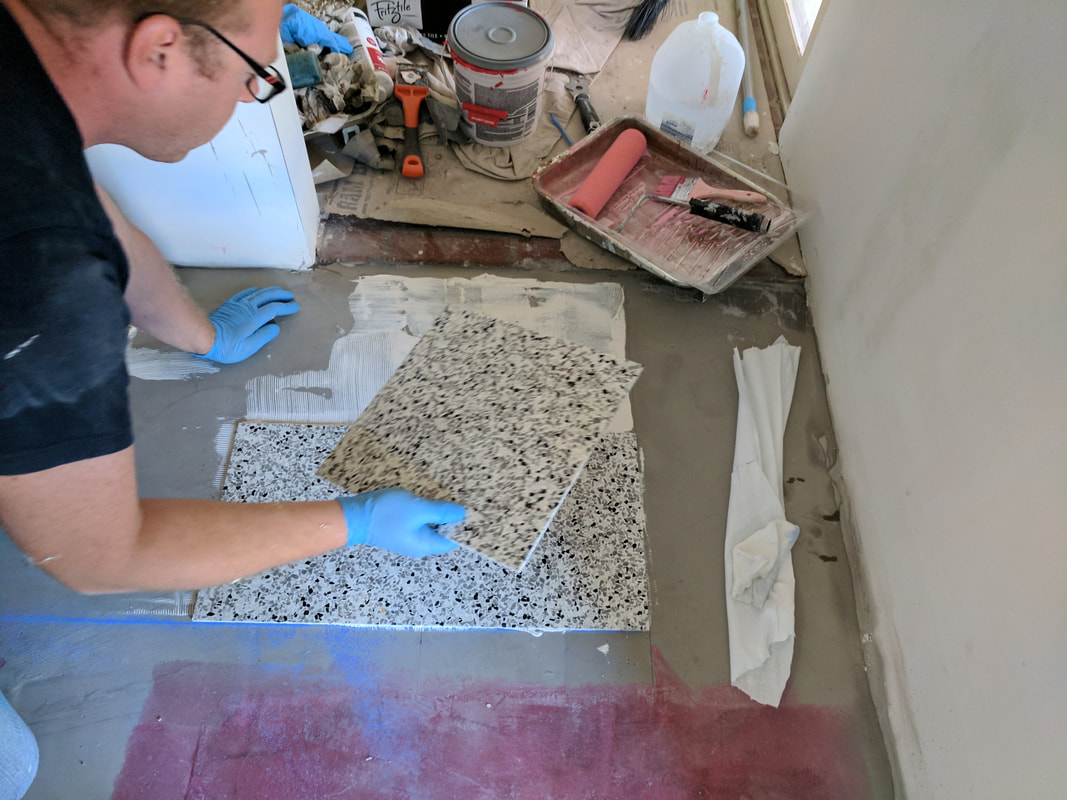 Lay more adhesive, lay tile, and press. No grout needed. 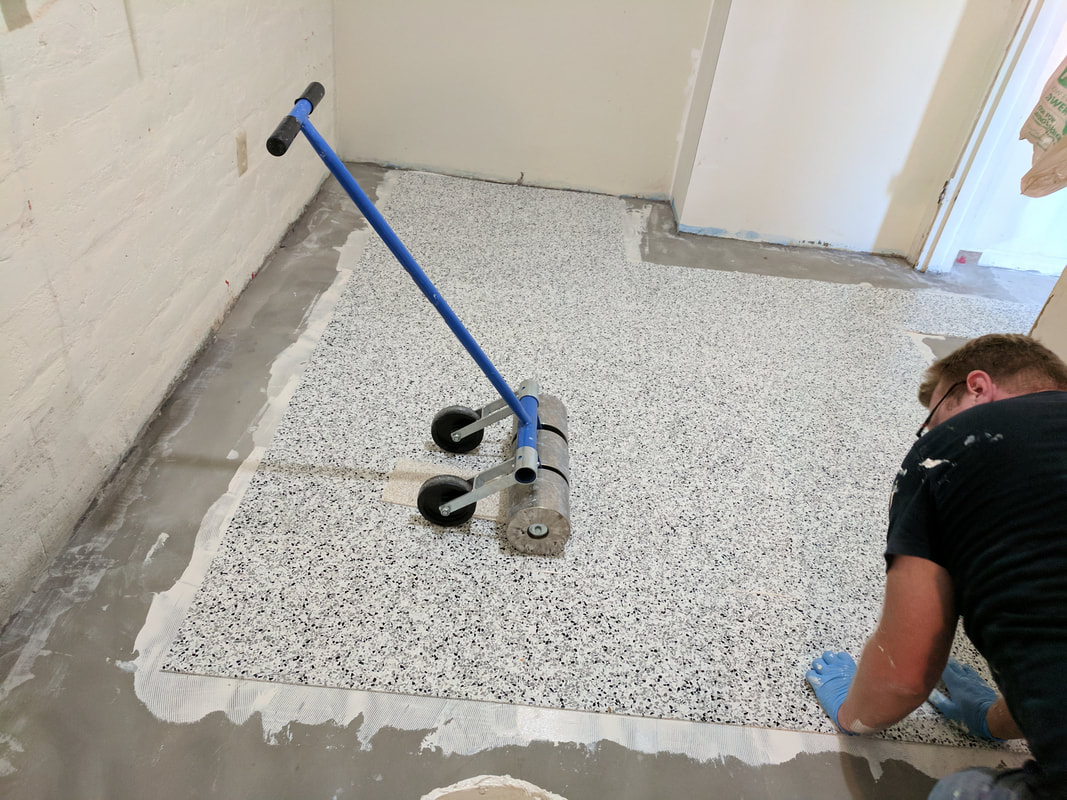 Use a linoleum roller to make sure the corners and the tile itself adheres properly. 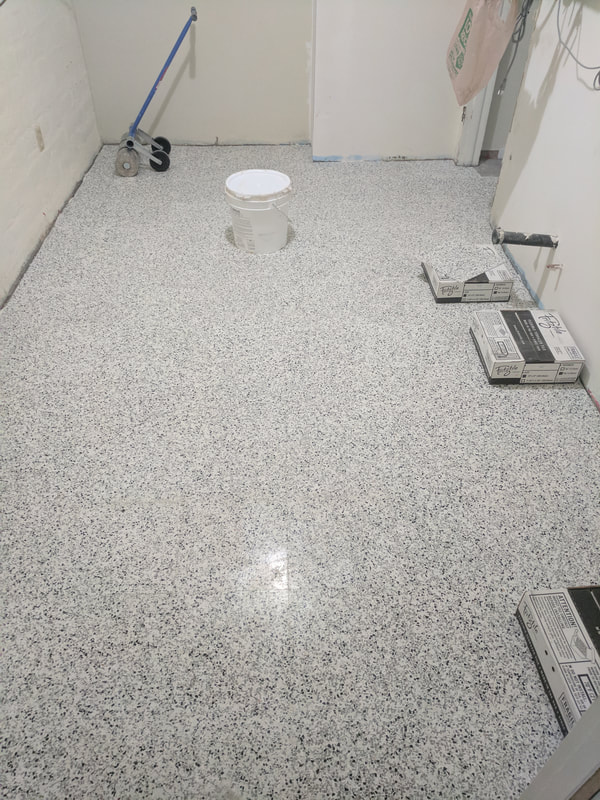 Cut whatever else you need to fit, adhere, wait, then seal. Some of the easiest tile to work with.
As we mentioned in the last post, the concrete floors have been ground and polished. So, before we can finish up in the main part of the house, we need to do some painting. 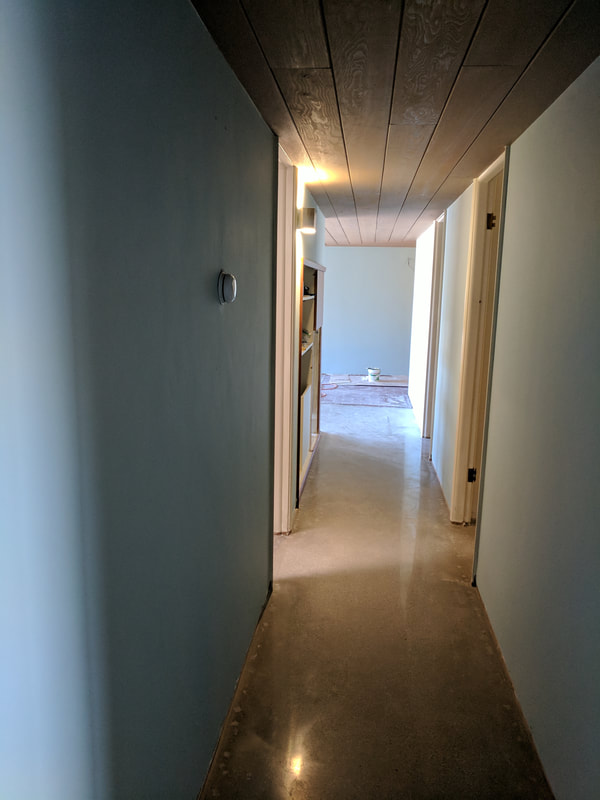 With the finished floors and the beautiful wood on the ceiling, painting the entry, hall and living room was NOT an easy job. We decided on Dunn Edwards Berry Mojito for the entry, hall and living room, as it is a mid-century-esque color that worked well with all of the wood in those areas. 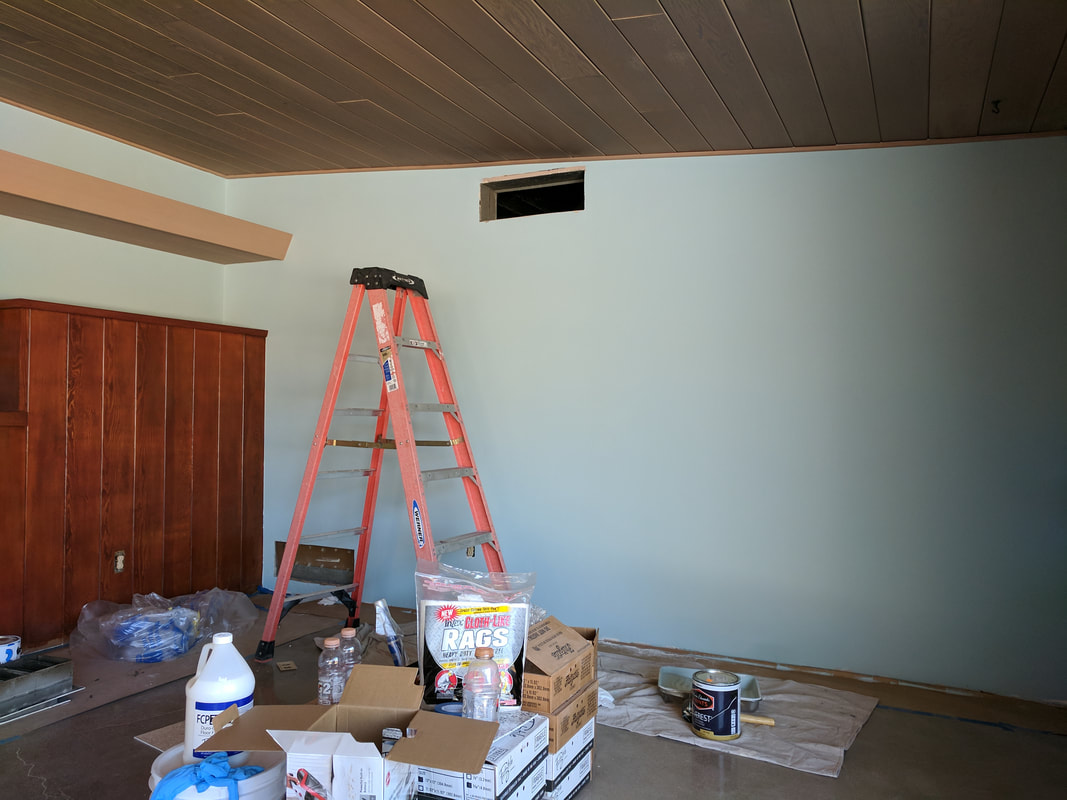 For some reason, when the previous owners painted everything white, they did not bother to remove the grates for the vents, and many had the screws painted over. It made for some difficult grate removal. 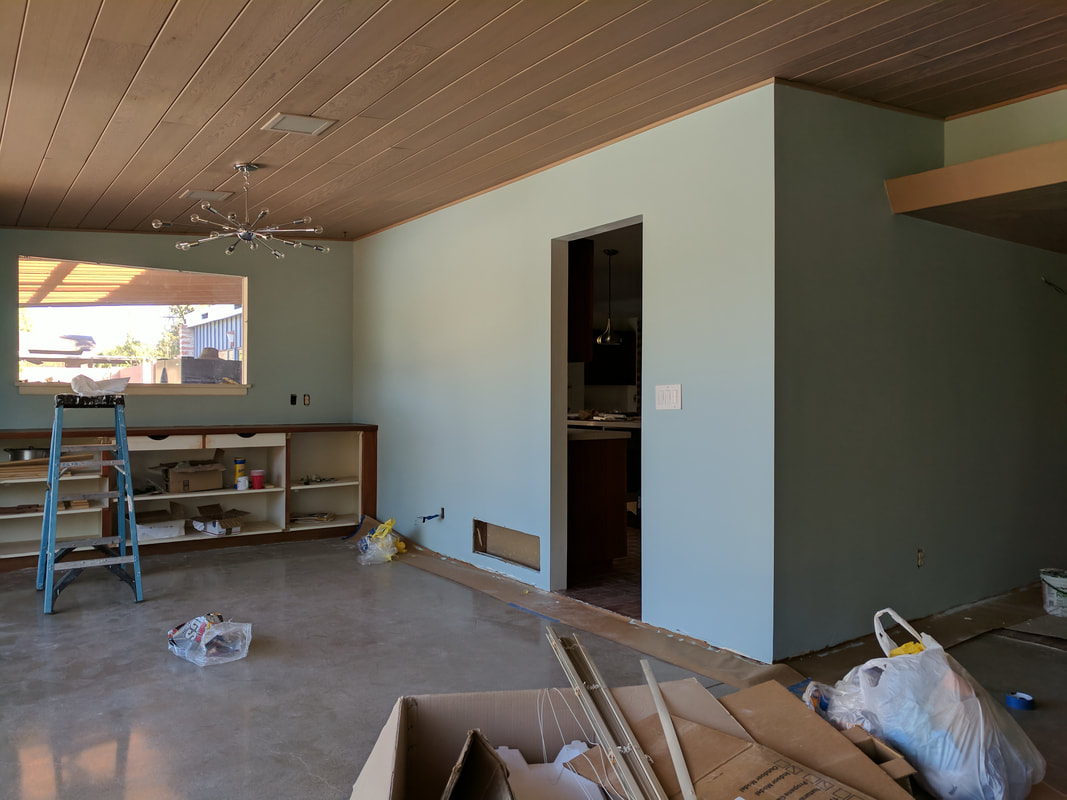 Oh, hello there, Sputnik. 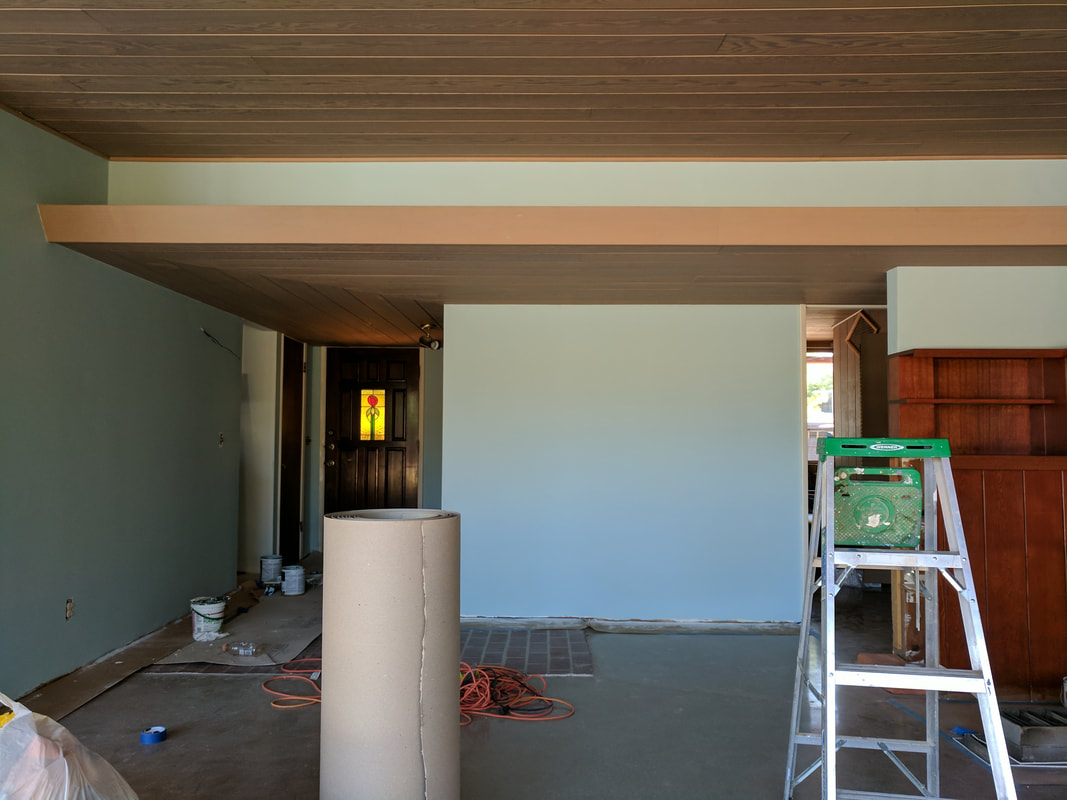 The hardest part to get was the area above the soffet, but it all turned out okay. We have a beautiful door chime and a fun, mid-century appropriate door that we are waiting on, but we are happy with how this color turned out. It works very well with the two different stains in the house.
Since things are starting to head to the finish line, we had Tile Renaissance finish grinding and sealing the concrete in the main part of the house. Needless to say, we were pleased with the result. 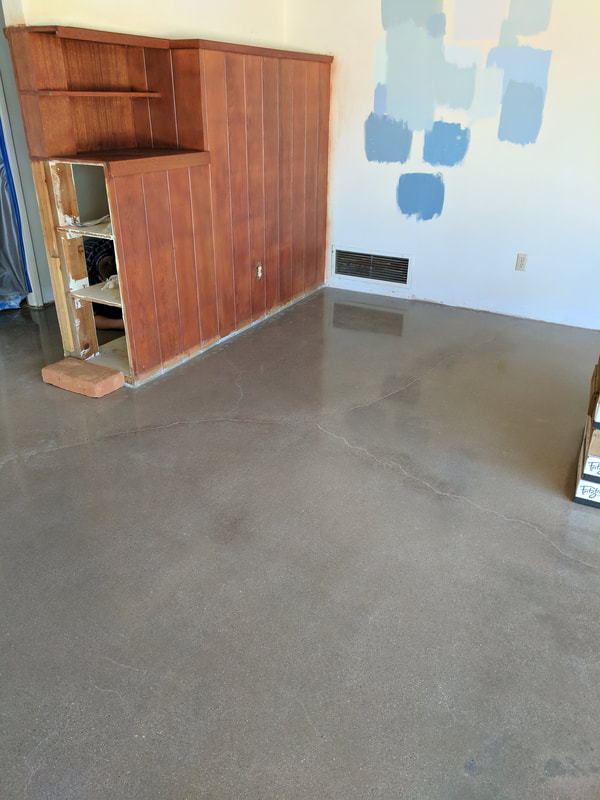 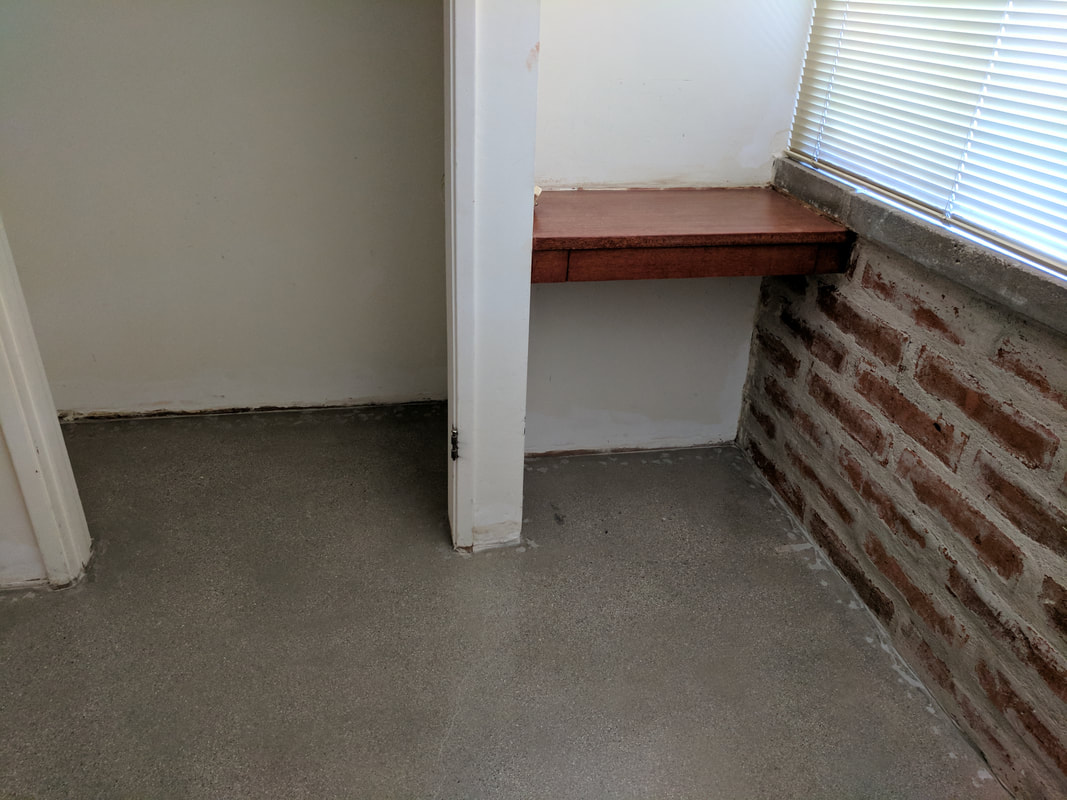 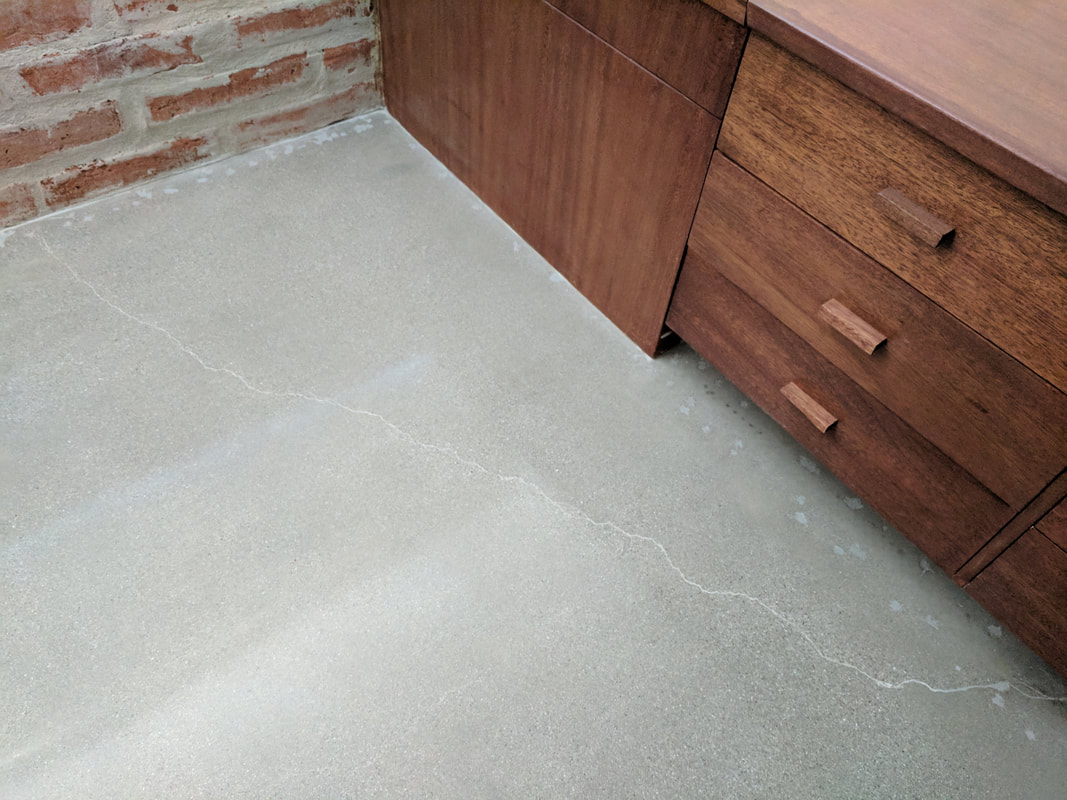 From the hall bedroom to the office... 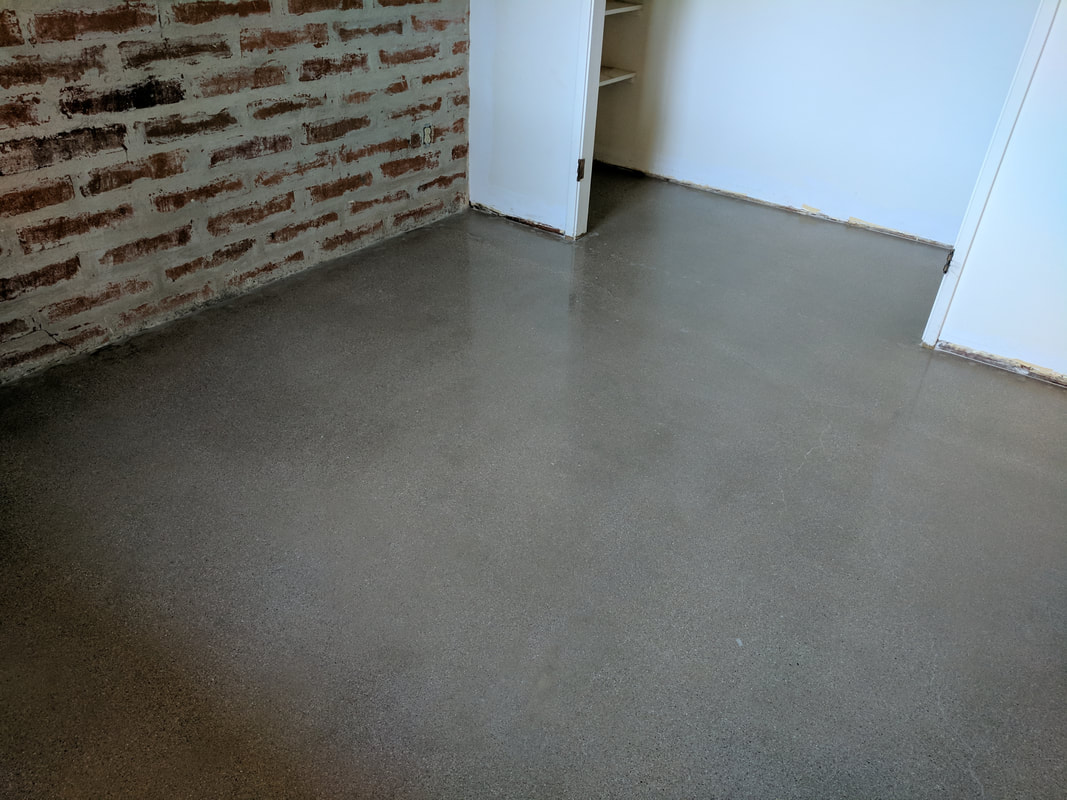 And the master. 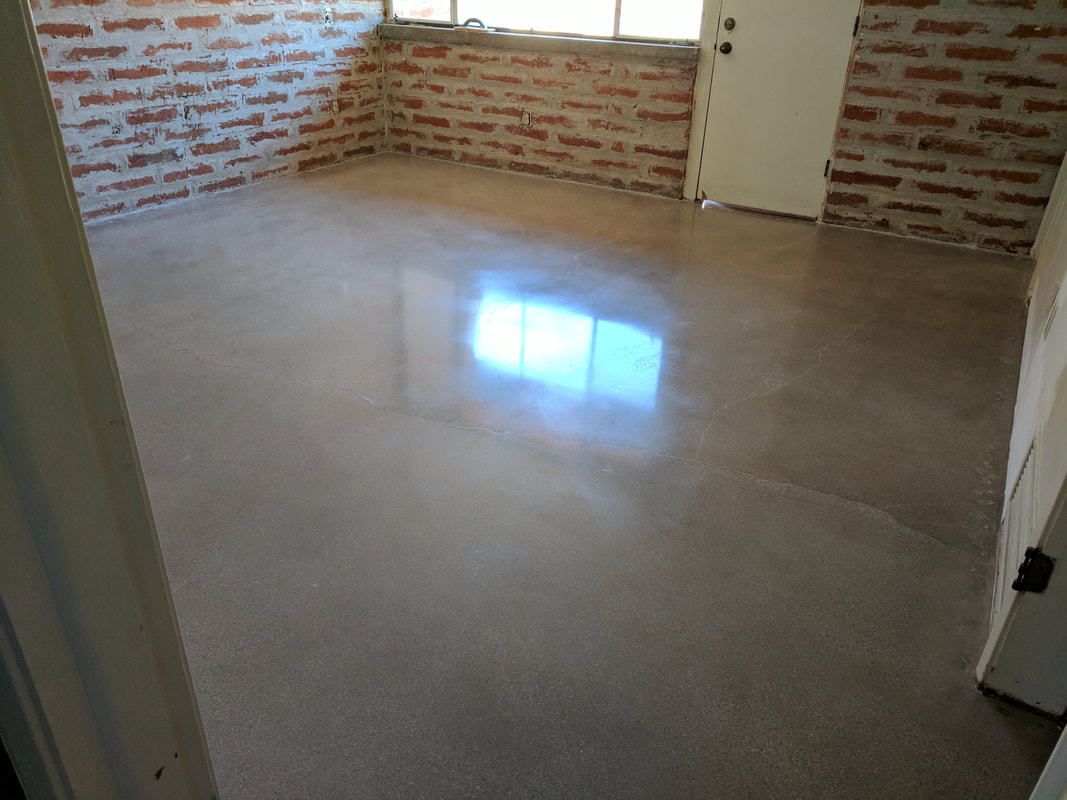 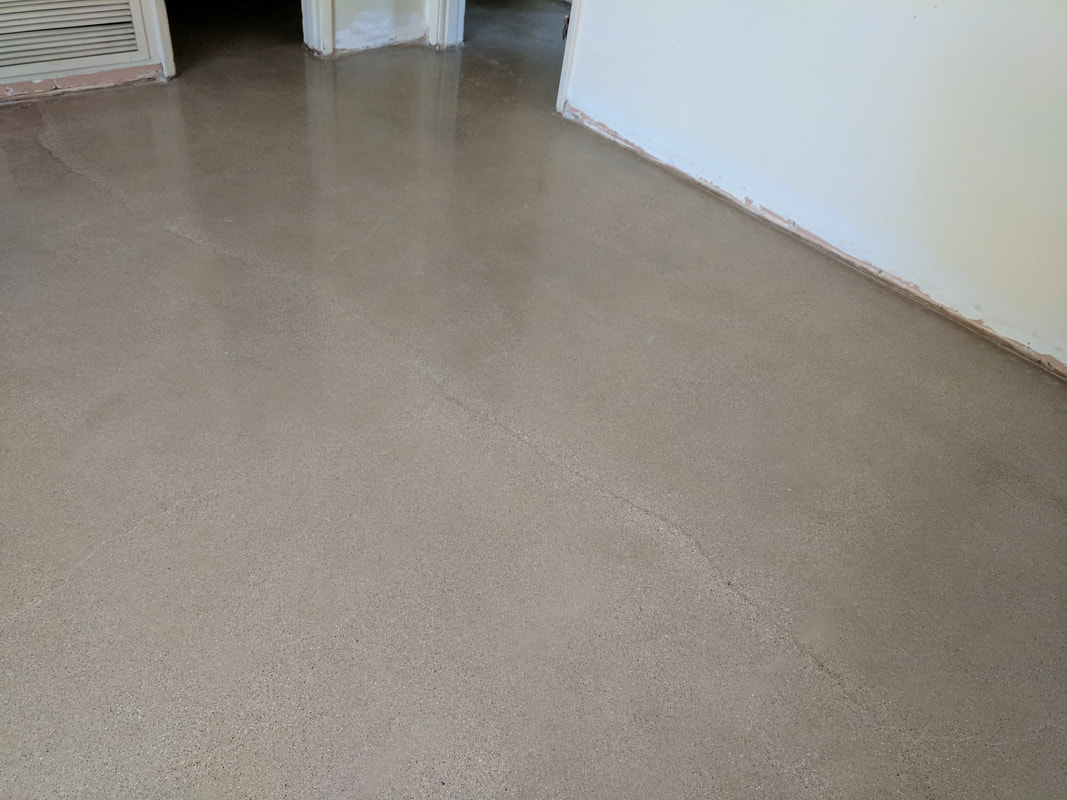 What really looks the best are the cracks within the concrete (all part of natural settling of the foundation). Here's a close up of the salt and pepper grind that we went with.  Beats the hell out of plain white carpet any day.
So, yes, it's been a while for us - Rachel started a new job at the end of August, and since she's the main blogger, things slowed down for us a bit here on the blog. If you follow our Instagram account, you may have seen some posts there showing Nathan installing the terrazzo in the bathrooms and the laundry room. For today's post, I'm going to walk you through how we installed it. 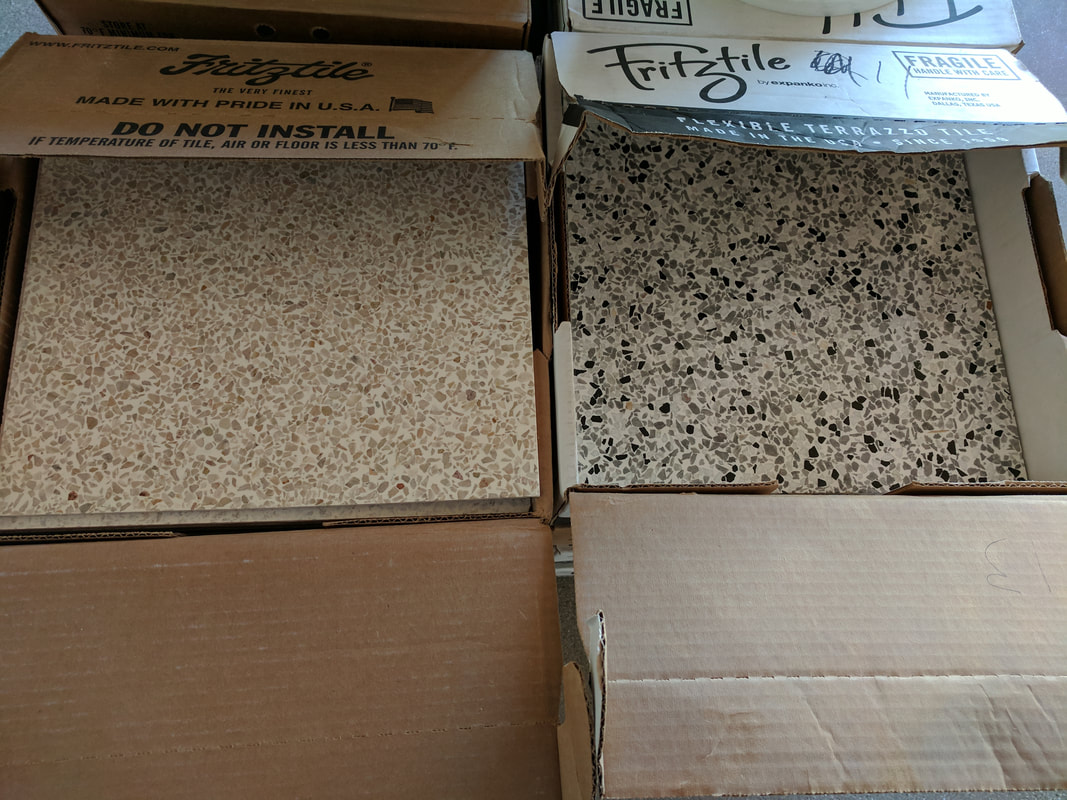 Part of our delivery from Fritztile. Now, in order to obtain Fritztile, you cannot just call them up and place an order. You need to decide on what you want, then call the nearest sales representative (which, for Tucson, is in Santa Fe) to get them to order your tile. Now, Fritztile requires you to use their own brand of floor adhesive and sealer, which you need to buy for your order. 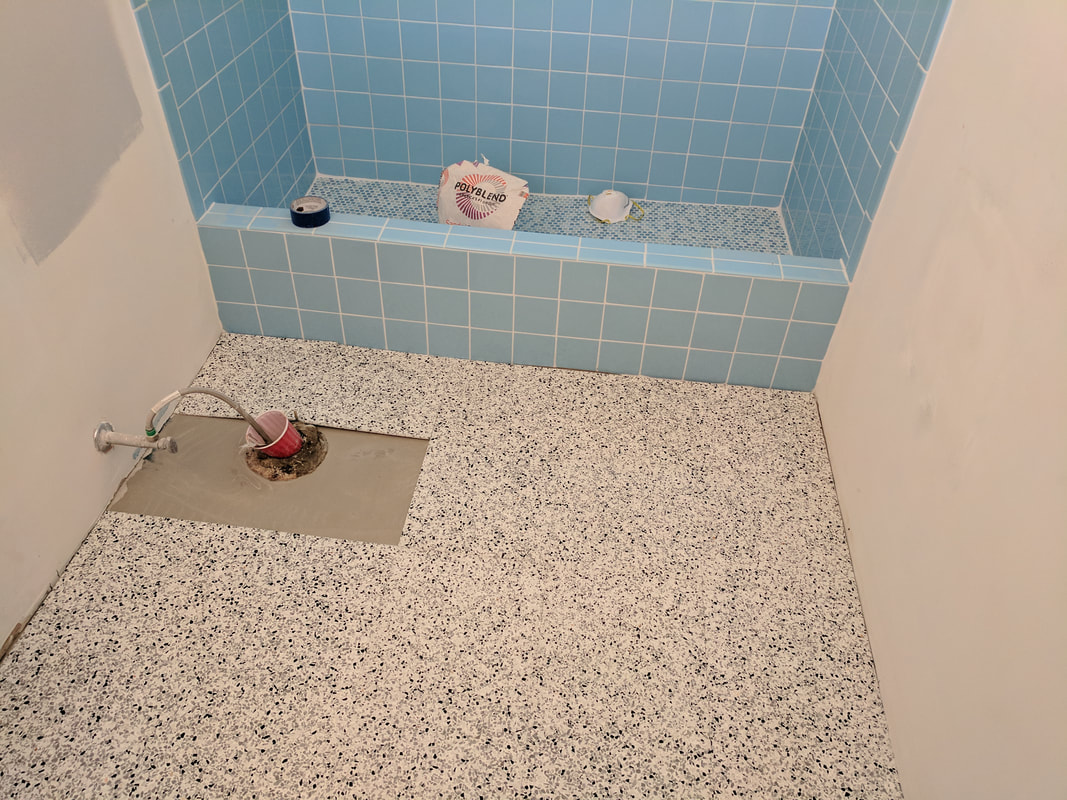 Once you get your order (and if you want to install yourself), you need to make sure that the floor that you are adhering the tile to is as close to even as possible. If you are installing in a wet area (bathrooms, laundry, kitchen), odds are you will need to put down Red Guard first. Then, you can pour the leveling concrete. Fritztile recommends Level Quick. I'll be frank here - Level Quick is a huge pain in the ass if you are not a professional who uses it regularly. We got our floors relatively even, then used a small floor grinder (looks like a pumice stone) to get things as close as possible. Then, you lay out the tile in the room and figure out how much you need and where you need to cut. 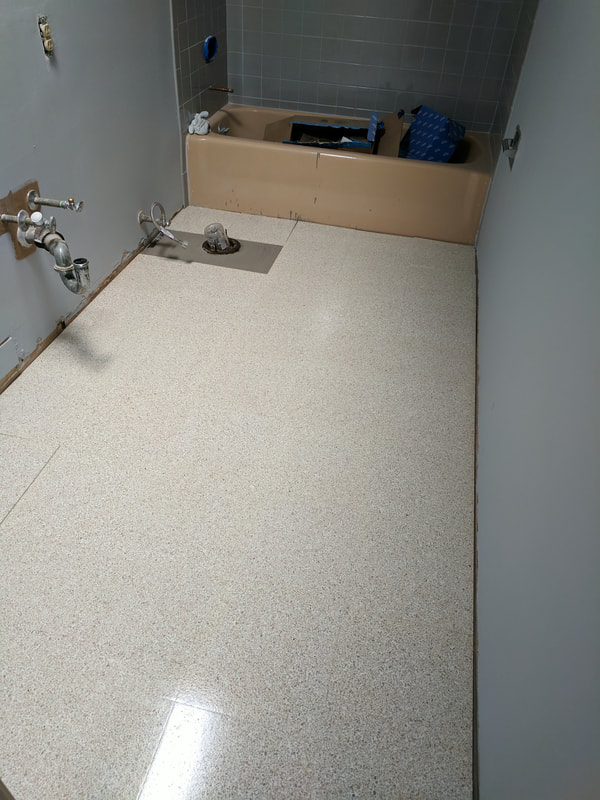 Laying down the tile ahead of time allows you to see if any tiles are warped, or if you have any areas that need to be ground even.  Once you are satisfied with the level of the floor, then you can start putting down the adhesive. Use a serrated trowel. In order to install Fritztile, your floor and air temperature MUST be above 70°F (not a problem most of the year here in Tucson). Also, they recommend for difficult surfaces to set the tiles out in the sun for 5-10 minutes before installing - it makes the tile a bit flexible and easier to install and adhere to the adhesive. Once installed and before the adhesive dries, take a linoleum roller (you can rent them from Home Depot) and roll over to make sure the corners adhere properly. 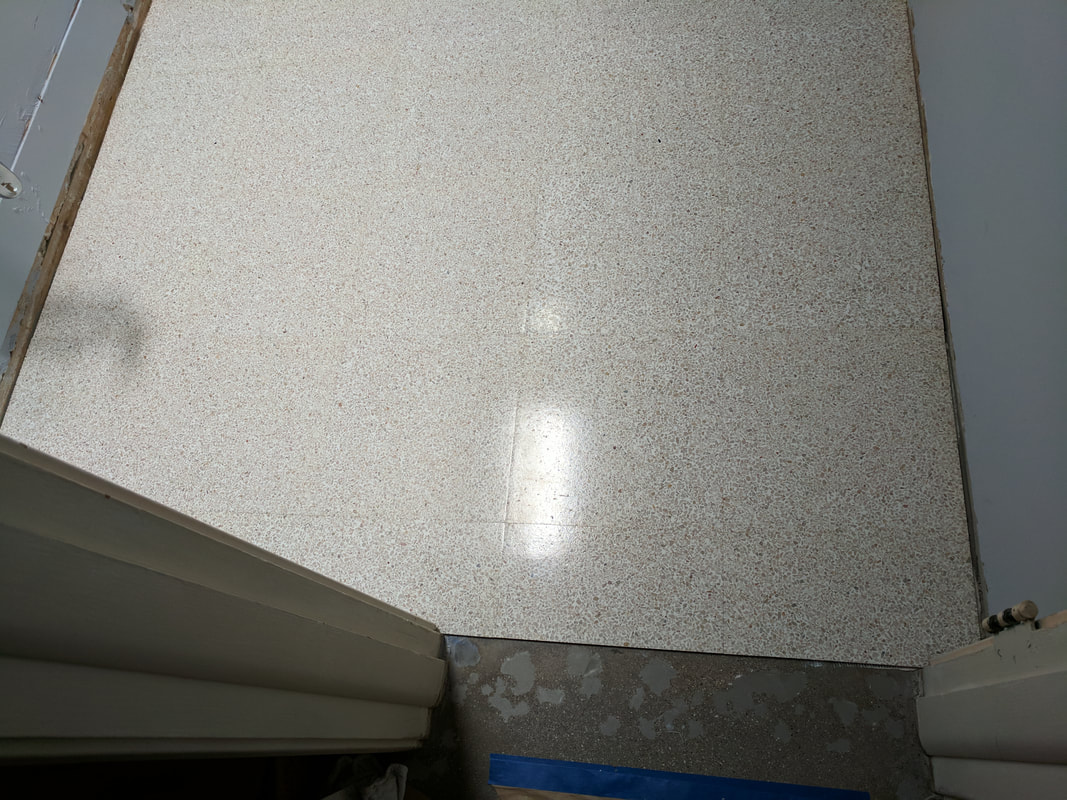 Any tiles that you need to cut can be cut with a wet saw. Then, after 24 hours, you need to clean off any extra adhesive that came up through the tiles. Then, you take the sealant and put on several coats, allowing for drying time between each. 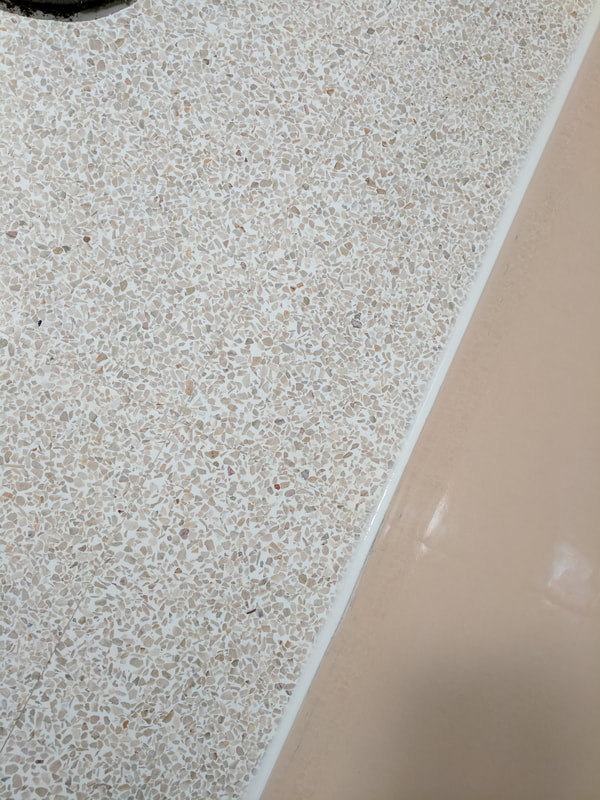 Once your sealant is dried, caulk the edges, and once that is dry, you are all done. It takes 2 to 3 days to lay the tile yourself. Sure, it is a lot of work - but we saved approximately $20 per square foot on installation costs (here in Tucson, the only people that know how to install this stuff is commercial installers, so the prices were astronomical).
Fritztile is a gorgeous product and worth hunting it out if you are interested in putting terrazzo in your mid-century restoration. More on our installation of Fritztile soon. |
About Us
In October 2016, Nathan & Rachel bought a 1958 Tom Gist custom home in the Mid-Century filled Wilshire Heights neighborhood in Tucson, AZ. This is our blog documenting the restoration! Archives
October 2017
Categories
All
|
 RSS Feed
